Obligatory finished picture first.
Materials
Got these old heating pipes for free from dad's friend.
These pipe connectors however were not free. After long searching I found these for 210€ with shipping from ebay. Ouch... However, since I have long wanted this kind of bookshelf, decided to pay for them anyway.
Cutting
This was the cutting station I had. Needless to say, better tools would have helped a lot. Ended up using that angle grinder with a diamond bit. Took around 10 to 15 minutes per cut, with total of 20 cuts this part of the project took a lot of time. And yeah, I'm aware I shouldn't use WD-40 as cutting oil, but didn't have anything else in my hand at the time.
Not too clean cut, but didn't really care since these would all end up hidden.
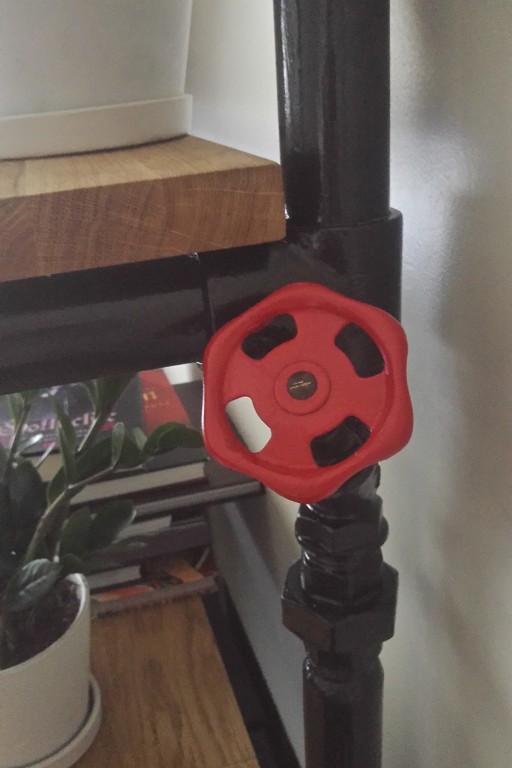
Wanted to keep this valve in one of these vertical pipes, as a coat or handbag hanger. However the pipe that continued above the valve were smaller diameter than rest of the pipe, so I cut small piece which I then epoxied over the smaller pipe. There were around 1 mm free space between the pipes and this part of the pipe didn't need to support really anything so I think this was good enough choice. Also, I do not own welding tools.
Drilling the holes for shelfes
Before drilling I loosely attached all the fittings and assembled the frame. After that I started drilling the holes with 3 mm diameter bit as a pilot hole. Didn't really matter which side I drilled the holes since I was going to adjust all the pipes anyway.
First casualty, might have pushed it too much.
Then moved on to bigger bit. I drilled the holes all the way trough the pipe, so the screws would end up hidden inside the pipe.
Another casualty... I just don't learn...
Lastly I drilled holes from one side with bigger bit, for the screwdriver's head to pass trough.
Also cleaned the smaller hole with the bigger bit.
All holes cut. After this I cleaned the whole frame with grease remover.
Assembly and painting
I then assembled the frame. Spent around hour measuring all the frame just to make sure all was square. Then finished the tightening with help of this pipe.
All done and ready for painting.
Used this hammered look paint. It was nice since it dried quite fast and I really didn't have to care too much about the brush strokes as it evened out itself. Also one layer was enough to cover it all.
After painting. Used the whole can of paint on the frame. (Well it was only 250ml (8,45oz) can..)
Closeup of the just painted surface
Also bought these end caps from the same seller as the connectors. They were not black like the sellers picture implied, so I cave them spray-on rubber coating.
The shelfes
Got these oak glulam(?) slabs from two old tables I did not need, had split them in half earlier this year. They were stained black, but since the frame was already black, I did not want these to be black as well. So I decided to sand them. Been waiting for good excuse to buy myself a belt sander, so I went and bought one. Did not regret.
After sanding
The frame was still bit skewed, so used some clamps and piece of leftover oak as a futile attempt to make it square. Might have helped a bit.
Here you can see how the screws hold the shelves in place.
Also gave the valve a new paint job.
Finishing


No comments:
Write comments